
Selenium with docker – Part 2
In the previous article, we saw how we can use a Docker stand-alone container with selenium. In this article, we will learn how to run selenium tests in parallel using a Selenium Grid on multiple containers.
What is Selenium Grid?
Selenium Grid is part of the selenium suite which allows users to run selenium tests on different machines in parallel. It works on HUB and NODE architecture.

The user needs to run a test on his single machine which is HUB, and it is HUB’s responsibility to distribute the test on a different node connected to the HUB.
Hub
A Hub is a central point where all your tests are sent. Each Selenium Grid consists of exactly one hub. The hub needs to be reachable from the respective clients (i.e. CI server, Developer machine, etc.) The hub will connect one or more nodes that tests will be delegated to.
Node
Nodes are different Selenium instances that will execute tests on individual computer systems. There can be many nodes in a grid. The machines which are nodes, do not need to be on the same platform or have the same browser selection like that of the hub or the other nodes. A node on Windows might have the capability of offering Internet Explorer as a browser option, whereas this wouldn’t be possible on Linux or Mac.
Challenges in using Selenium Grid without Docker
To run the selenium tests on multiple machines in parallel using selenium grid, there are few setbacks –
- We need to have multiple machines/VMs up and running.
- We need to set up the different browsers on different machines.
- We need to download Selenium jar file on all the machines and need to run the command on all the machine which we are using as hub and node.
- In case we want to scale the number of nodes for more parallel sessions, we need more machines.
- Considering the above points, this setup requires cost and is not very scalable.
How does docker helps in overcoming above challenges?
- We don’t need multiple machines. We just need to start the container with the required configuration in the image. This configuration includes different browsers, browser versions, different OS, etc.
- Docker is highly scalable and you can run as many nodes as required with just single command.
Setting up Docker Container Grid
We need to follow the below steps to setup Selenium Grid on Docker Containers –
- Pull the following docker images using commands given below:
- selenium/hub
- selenium/node-chrome
- selenium/node-firefox
docker pull selenium/hub
docker pull selenium/node-chrome
docker pull selenium/node-firefox- Once the above docker images pull is complete, verify the same using the below command –
docker images
- Once the images are ready, start the hub container using the command below :
docker run -d -p 4455:4444 --name selenium-hub selenium/hubIn above command:
docker run: Syntax to run docker container
-d: To run the container in detached mode or in background
-p 4455:4444: Published port in host: container format. Now local/host machine’s port is available for the public and any nodes connected to this hub can be seen using localhost:4455/grid/console
–name selenium-hub: Name of the container
- Now when the hub is running, we need to link all browser images to the hub using the below command
docker run -d --name firefox-node --link selenium-hub:hub selenium/node-firefox

docker run -d --name chrome-node --link selenium-hub:hub selenium/node-chrome- Verify if all the containers are running successfully or not.
docker ps
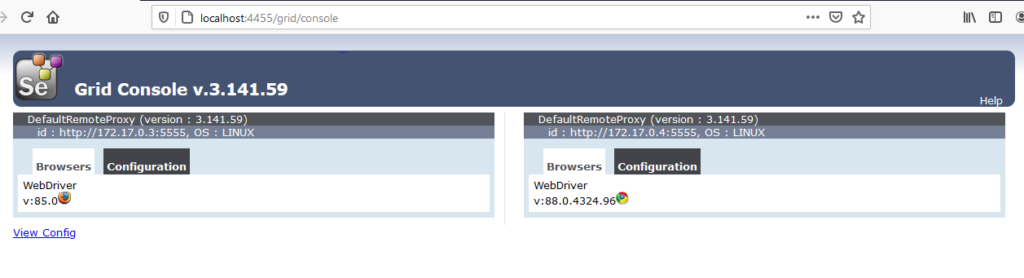
- You can also verify the node connected to the hub using URL – localhost:4455/grid/console
- Run the below Selenium test on Selenium grid –
    @Parameters("browserName")
    @Test
    public void launchTestInDockerGrid(String browserName) throws MalformedURLException {

        WebDriver driver;
        if (browserName.equalsIgnoreCase("chrome")){
            ChromeOptions chromeOptions = new ChromeOptions();
            driver = new RemoteWebDriver(new URL("http://localhost:4455/wd/hub"), chromeOptions);
            driver.get("https://www.google.co.in");
            Assert.assertTrue(driver.getTitle().contains("Google"));
            driver.quit();
        }else if (browserName.equalsIgnoreCase("firefox")){
            FirefoxOptions firefoxOptions = new FirefoxOptions();
            driver = new RemoteWebDriver(new URL("http://localhost:4455/wd/hub"), firefoxOptions);
            driver.get("https://in.yahoo.com/");
            Assert.assertTrue(driver.getTitle().contains("Yahoo"));
            driver.quit();
        }
    }
Make testNG.xml file like below –
<?xml version="1.0" encoding="UTF-8"?>
<!DOCTYPE suite SYSTEM "http://testng.org/testng-1.0.dtd" >
<suite name="Demo Suite" parallel="tests" thread-count="2" preserve-order="true">
    <test name="FireFox">
        <parameter name="browserName" value="firefox"/>
        <classes>
            <class name="com.docker.DemoClass"></class>
        </classes>
    </test>
    <test name="Chrome">
        <parameter name="browserName" value="chrome"/>
        <classes>
            <class name="com.docker.DemoClass"></class>
        </classes>
    </test>
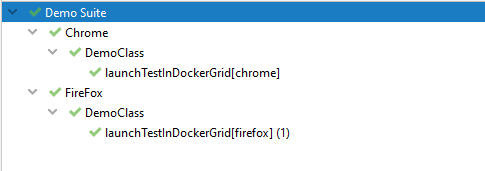
</suite>- Execute the above selenium test and see the result in your IDE. Test results will look like below:
Launching Selenium Grid on docker using docker compose
In the above approach, we launched the selenium hub and container using separate commands. There is another way of doing all this process by just one command. We need to use docker-compose (a component of docker). Docker-compose comes bundled with Docker desktop on Mac and Windows. If you are using Linux, please install docker-compose separately.
Refer to this page for the docker-compose installation process.
With docker-compose, we can start or stop the whole architecture with just one command. We need to configure all application services in the YAML file and need to start this using the docker-compose command.
Lets create our YAML file to start the Selenium Grid on DOCKER.
- Create docker-compose YAML file and save it in .yml format. For this demo, the file name is docker-compose.yml
version: "3"
services:
  selenium-hub:
    image: selenium/hub
    container_name: selenium-hub
    ports:
      - "4455:4444"
  chrome:
    image: selenium/node-chrome
    container_name: selenium-chrome-node
    volumes:
      - /dev/shm:/dev/shm
    depends_on:
      - selenium-hub
    environment:
      HUB_PORT_4444_TCP_ADDR: selenium-hub
      HUB_PORT_4444_TCP_PORT: 4444
      NODE_MAX_SESSION: 1
      NODE_MAX_INSTANCES: 1

  firefox:
    image: selenium/node-firefox
    container_name: selenium-firefox-node
    volumes:
      - /dev/shm:/dev/shm
    depends_on:
      - selenium-hub
    environment:
      HUB_PORT_4444_TCP_ADDR: selenium-hub
      HUB_PORT_4444_TCP_PORT: 4444
      NODE_MAX_SESSION: 2
      NODE_MAX_INSTANCES: 2
In the above YAML file, 3 containers will start. One will be the hub and one will be chrome node and one will be firefox node.
version: 3
services: It contains the list of all containers.
image: It defines image which will be used to start container.
container_name: Name of the container
ports: ports in host:container format
volume: It is used to mount path of shared memory in host:container format.
depends_on: This is used to define the dependency of one container to another. In this file, the chrome and Firefox node will spin up after the selenium hub.
environment: This is used to define environment variables.
NODE_MAX_SESSION And NODE_MAX_INSTANCES: These variables are used to define how many different browsers can be opened in a node container. NODE_MAX_SESSION is used to define how many different browsers can open in the container. NODE_MAX_INSTANCES is used to define how many different instances of the same browser we can open in the container.
- Run the below command to start containers –
docker-compose -f /pathtoYAMLfile/filename.yml up -d
- Verify the container running by below command –
docker ps
- Open the url http://localhost:4455/grid/console –
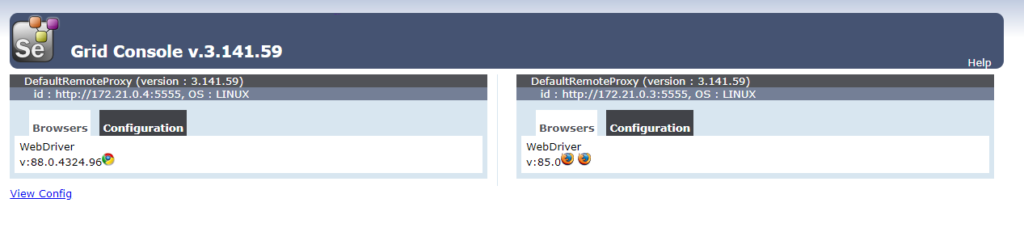
- Now as the grid has been started and containers are running, we can run our selenium suite.
- To scale the grid or increase the number of nodes, use the below command and see the number of nodes on localhost:4455/grid/console
docker-compose -f C:/GitProjects\BigShyftAutmation\david-automation-suite\docker-compose.yml up -d
 --scale chrome=4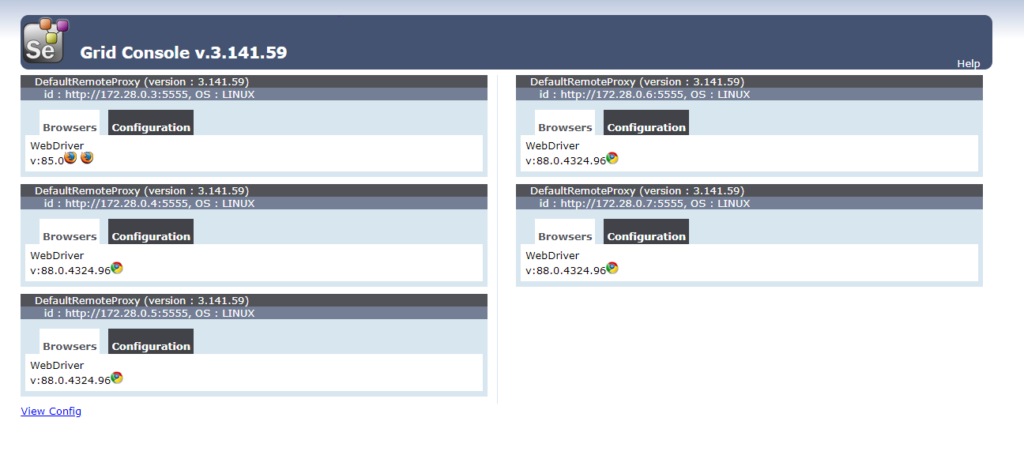
To scale any node, the container name needs to be removed from the YAML file for that node because the name is an optional field and the same name cannot be used for more than 1 container.
If container_name is given for any node, we’ll get an error while scaling –

- To visualize what is running on the browsers, we can use debug images for nodes. Pull the debug images for nodes using the commands below –
docker pull selenium/node-chrome-debug

docker pull selenium/node-firefox-debug- We need to make changes in the YAML file for debug images. We need to change the image names and need to add ports for the VNC viewer connection –
version: "3"
services:
  selenium-hub:
    image: selenium/hub
    container_name: selenium-hub
    ports:
      - "4455:4444"
  chrome:
    image: selenium/node-chrome-debug
    container_name: selenium-chrome-node-debug
    volumes:
      - /dev/shm:/dev/shm
    depends_on:
      - selenium-hub
    environment:
      HUB_PORT_4444_TCP_ADDR: selenium-hub
      HUB_PORT_4444_TCP_PORT: 4444
      NODE_MAX_SESSION: 1
      NODE_MAX_INSTANCES: 1
    ports:
      - "6901:5900"

  firefox:
    image: selenium/node-firefox-debug
    container_name: selenium-firefox-node-debug
    volumes:
      - /dev/shm:/dev/shm
    depends_on:
      - selenium-hub
    environment:
      HUB_PORT_4444_TCP_ADDR: selenium-hub
      HUB_PORT_4444_TCP_PORT: 4444
      NODE_MAX_SESSION: 2
      NODE_MAX_INSTANCES: 2
    ports:
      - "6902:5900"
- Start the grid using the same command which we used for the docker-compose file without debug image
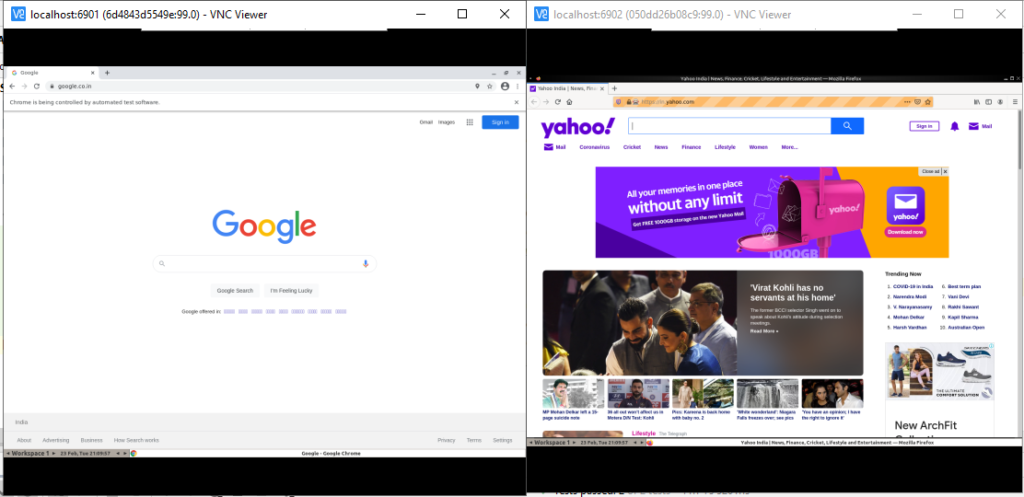
- Open the VNC viewer and connect to containers at localhost:6901 and localhost:6902
- Execute your selenium tests and see the browsers running in VNC viewer –
- To stop the docker grid running and destroy complete infrastructure created, run the below command –
docker-compose -f /pathtoYAMLfile/filename.yml down
- By just one command complete grid is destroyed
Conclusion
In this article, we have seen how easy is to start the docker grid. How can we create complete infrastructure by running just one command after the initial setup is done?